Project Background
In the real world, operating systems rarely run directly on bare metal anymore. Modern infrastructure relies on virtualization to maximize resource efficiency and manageability. To mirror an enterprise environment I recently purchased an old HP ProLiant DL380p Gen8 server to build a dedicated Type-1 Hypervisor environment from scratch.
This allows me to experiment with bare-metal configurations, RAID storage arrays, and industry-standard virtualization platforms without the risks associated with a production network. While tools like Proxmox are popular for home use, I chose VMware ESXi for this phase to gain experience with the industry-standard hypervisor found in most corporate data centers.
Project Overview
The Objective
- Provision a bare-metal server with enterprise-grade storage redundancy.
- Install and configure a Type-1 Hypervisor (VMware ESXi 6.7).
- Establish a virtual media library for future server deployments.
Hardware Preparation and RAID Configuration
Hardware Used:- Server: HP ProLiant DL380p Gen8 Server
- RAM: 224GB
- Storage: 5 x 1TB HDD
- Boot Drive: 240GB SSD
- Raid Controller: HP Smart Array P420i
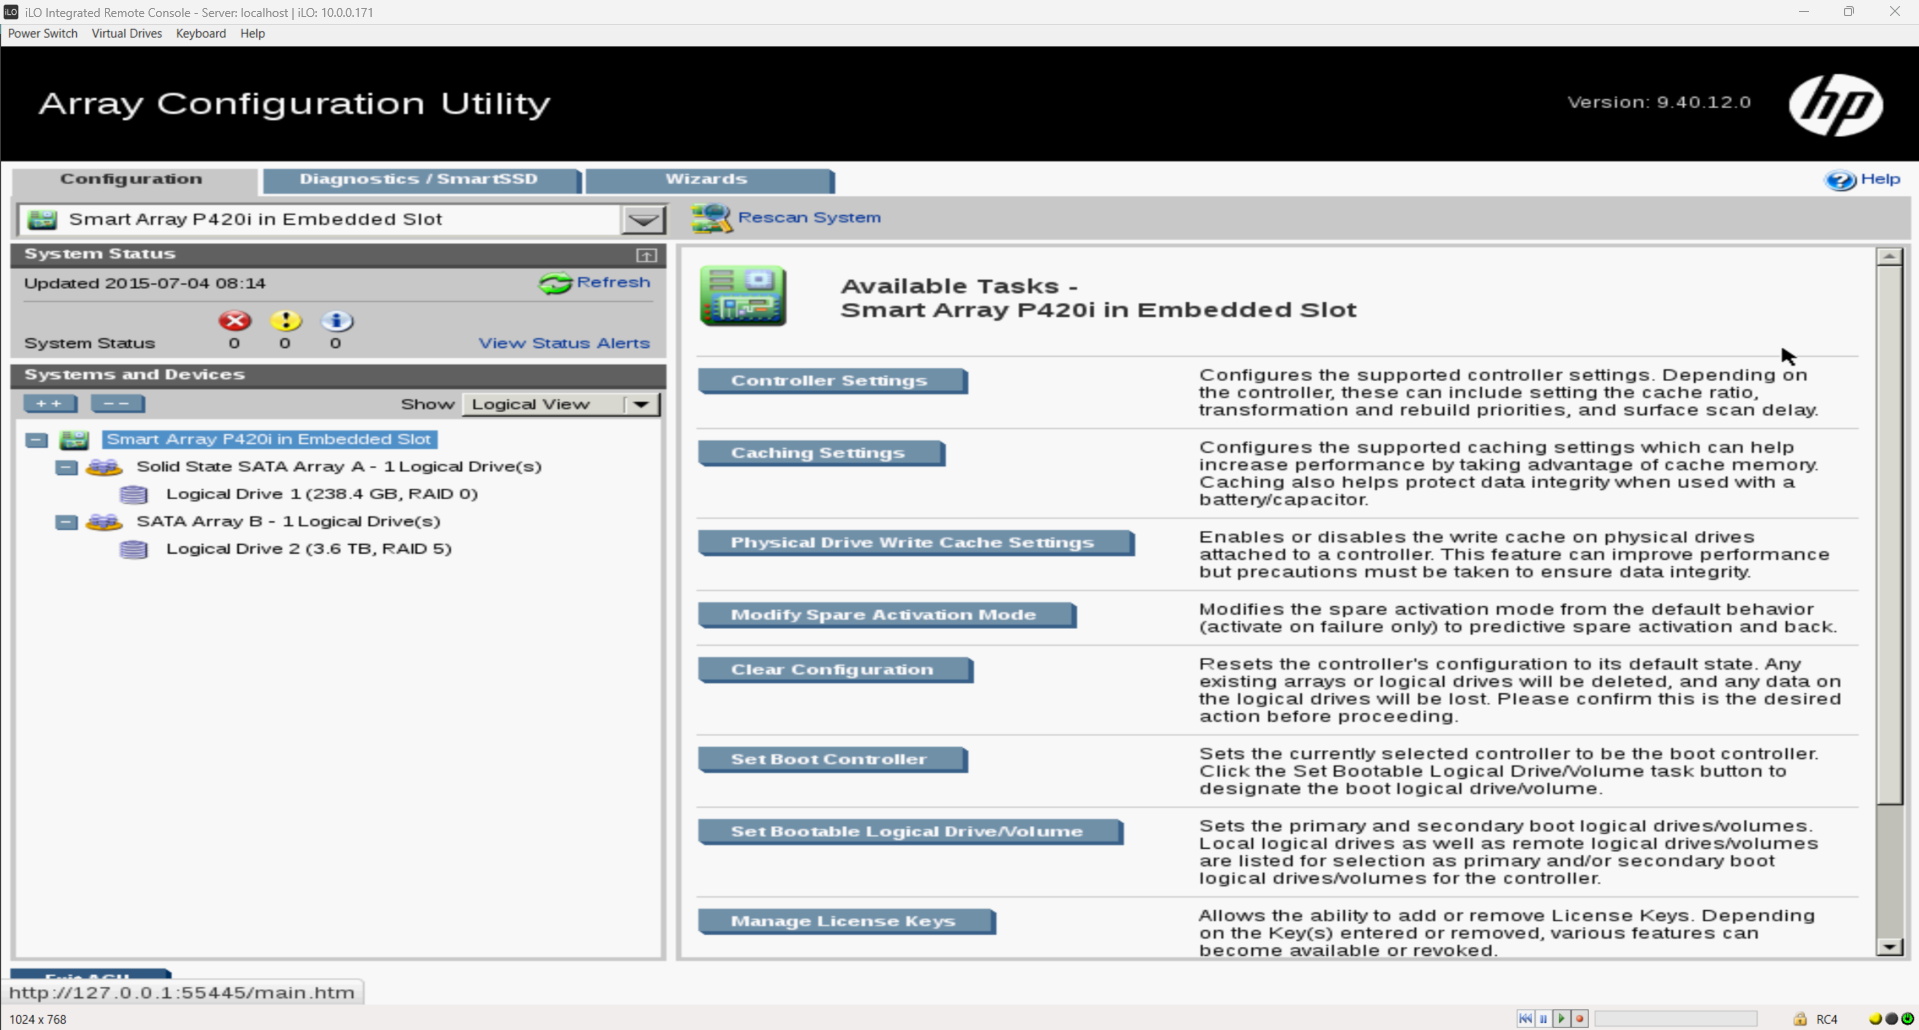
Before installing the hypervisor, I booted into the HP Smart Storage Administrator (SSA) to configure the logical drives. I decided to separate the hypervisor operating system from the virtual machine data for better management and performance.
I configured the storage in two distinct arrays:
- Logical Drive 1 (RAID 0): I configured the single SSD in RAID 0. This serves as the fast boot volume for the ESXi hypervisor itself.
- Logical Drive 2 (RAID 5): I configured the remaining hard drives into a RAID 5 array. This acts as the primary datastore for my Virtual Machines. This configuration is critical for the lab because it provides fault tolerance if one of the mechanical drives fails, the parity data allows the system to remain operational without data loss.
Implementation Strategy
The project involves several key phases:
- Hardware Preparation: Configuring RAID 0 on the SSD and RAID 5 on the mechanical drives.
- ESXi Installation: Booting from a custom ISO and installing the hypervisior on the bare metal.
- Network Configuration: Setting up vSwitches, Port Groups, and VLANs to segregate traffic (Management, VM Traffic, vMotion).
- Virtual Machine Deployment: Creating and optimizing VMs for various workloads.
Installing the Hypervisor (VMware ESXi 6.7)
With my storage tiers configured, I proceeded to install VMware ESXi 6.7. Unlike a Type-2 hypervisor (like VirtualBox or VMWare Workstation Pro) which runs on top of an OS, ESXi installs directly on the hardware.
The Process:
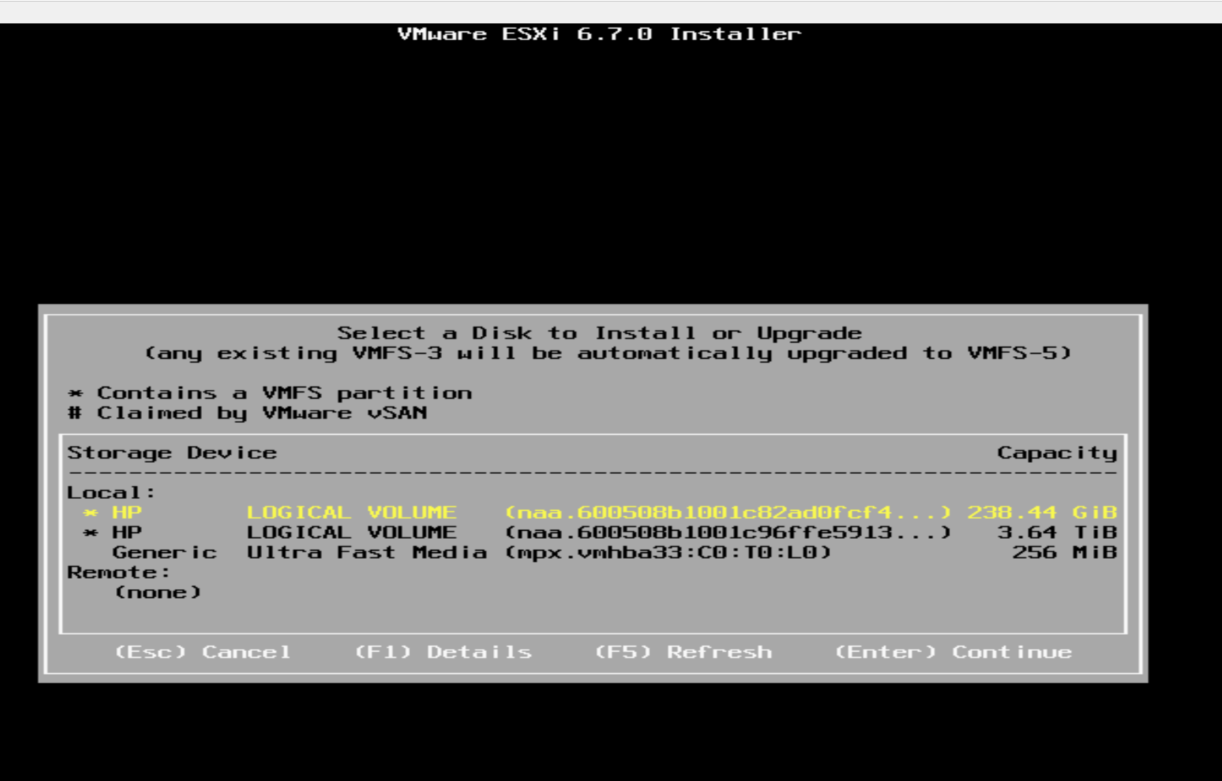
- Boot Media: I used the iLO Integrated Remote Console to mount the ESXi ISO image to the server.
- Target Selection: When prompted to select a disk, I chose the RAID 0 SSD volume. Installing the hypervisor here ensures faster boot times and a more responsive management interface compared to the mechanical hard drives.
- Configuration: I configured the root password and keyboard layout.
- First Boot: After the installation, the server rebooted and booted into the ESXi shell.
Network Configuration & Management Interface
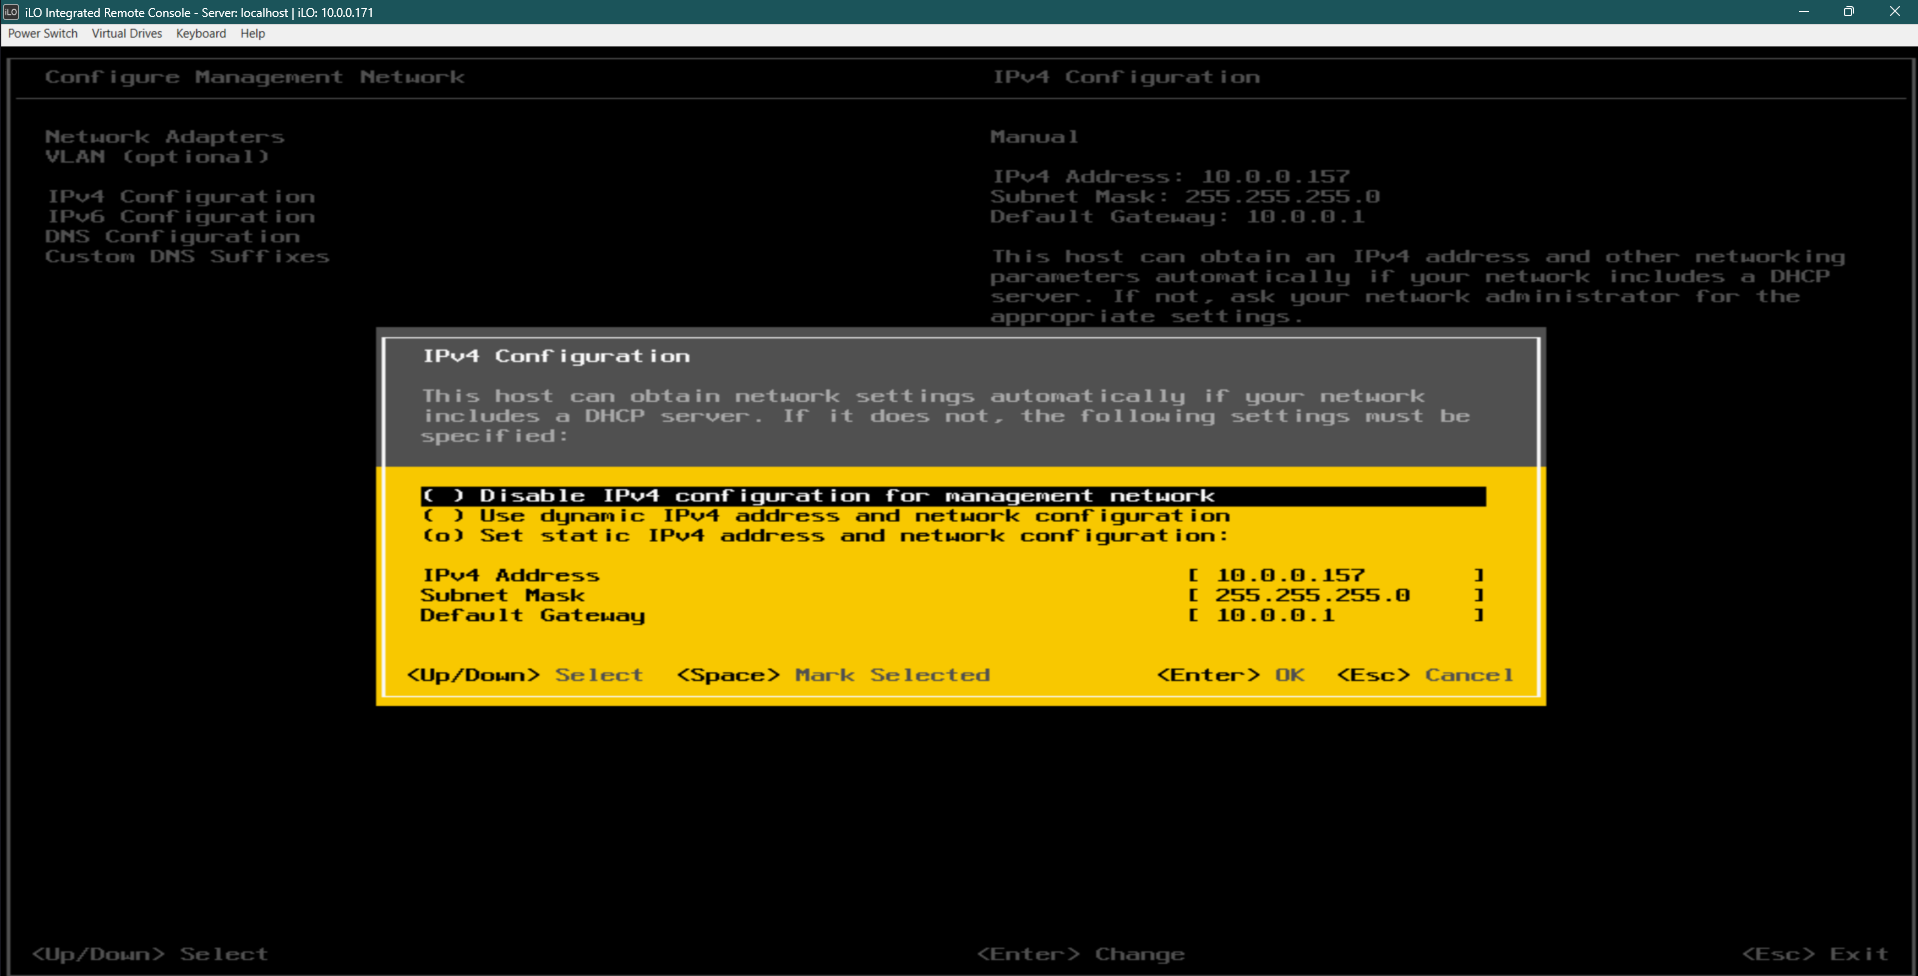
Once the server rebooted from the SSD, it displayed the Direct Console User Interface (DCUI). By default, servers often attempt to pull a dynamic IP, but for a stable infrastructure, static addressing is mandatory.
I configured the management network with a static IP address to ensure consistent access to the web interface.
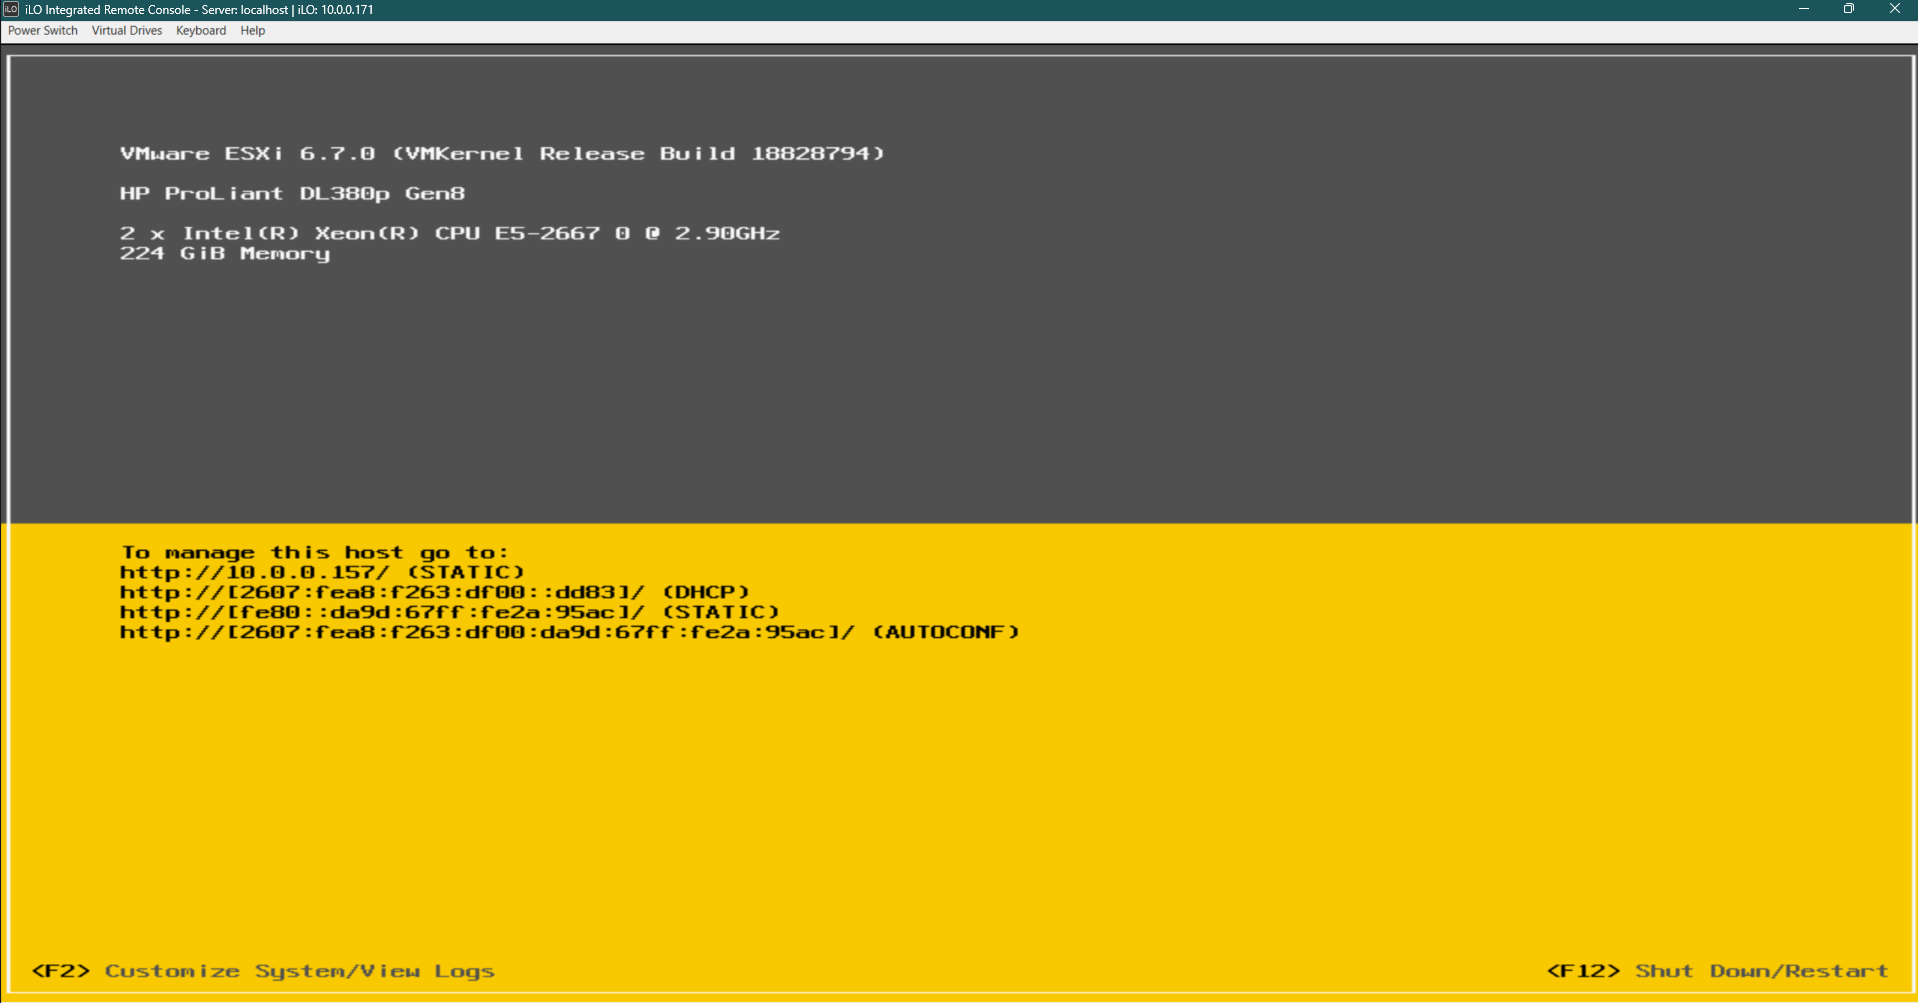
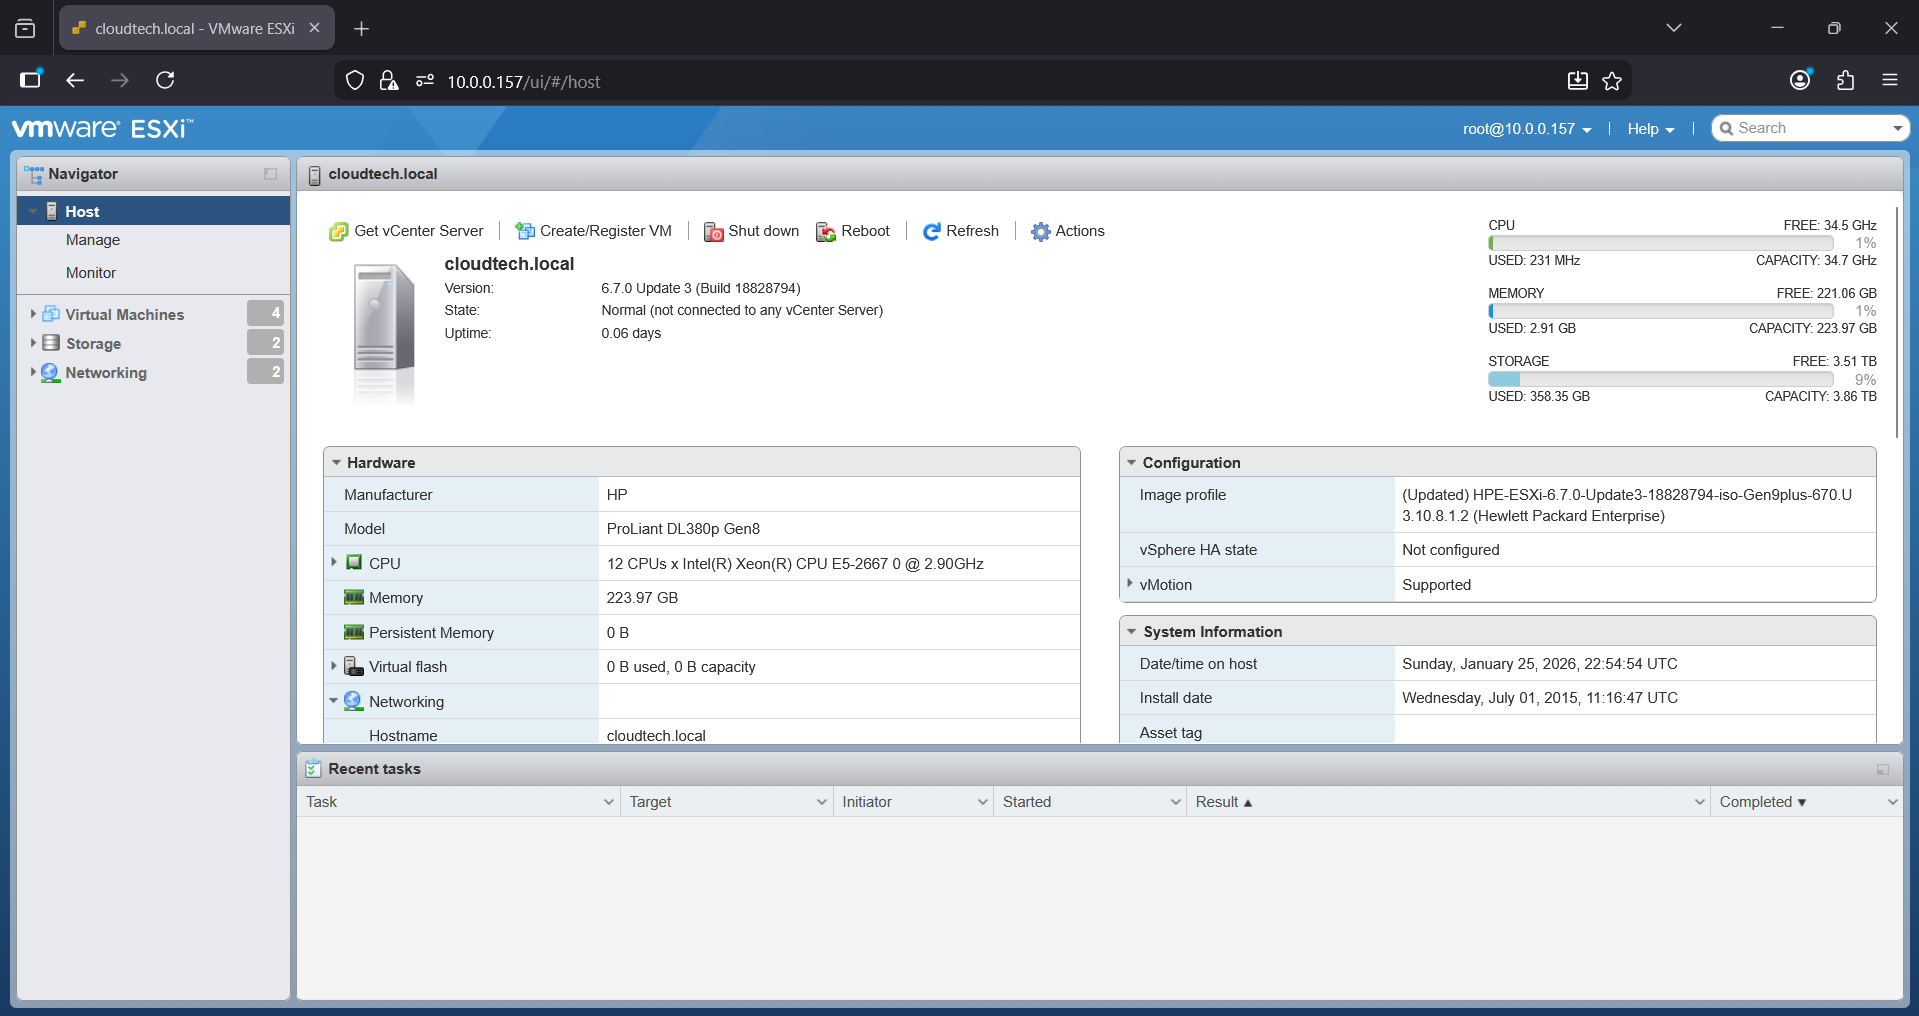
I then accessed the server via the web browser.
Building the ISO Library
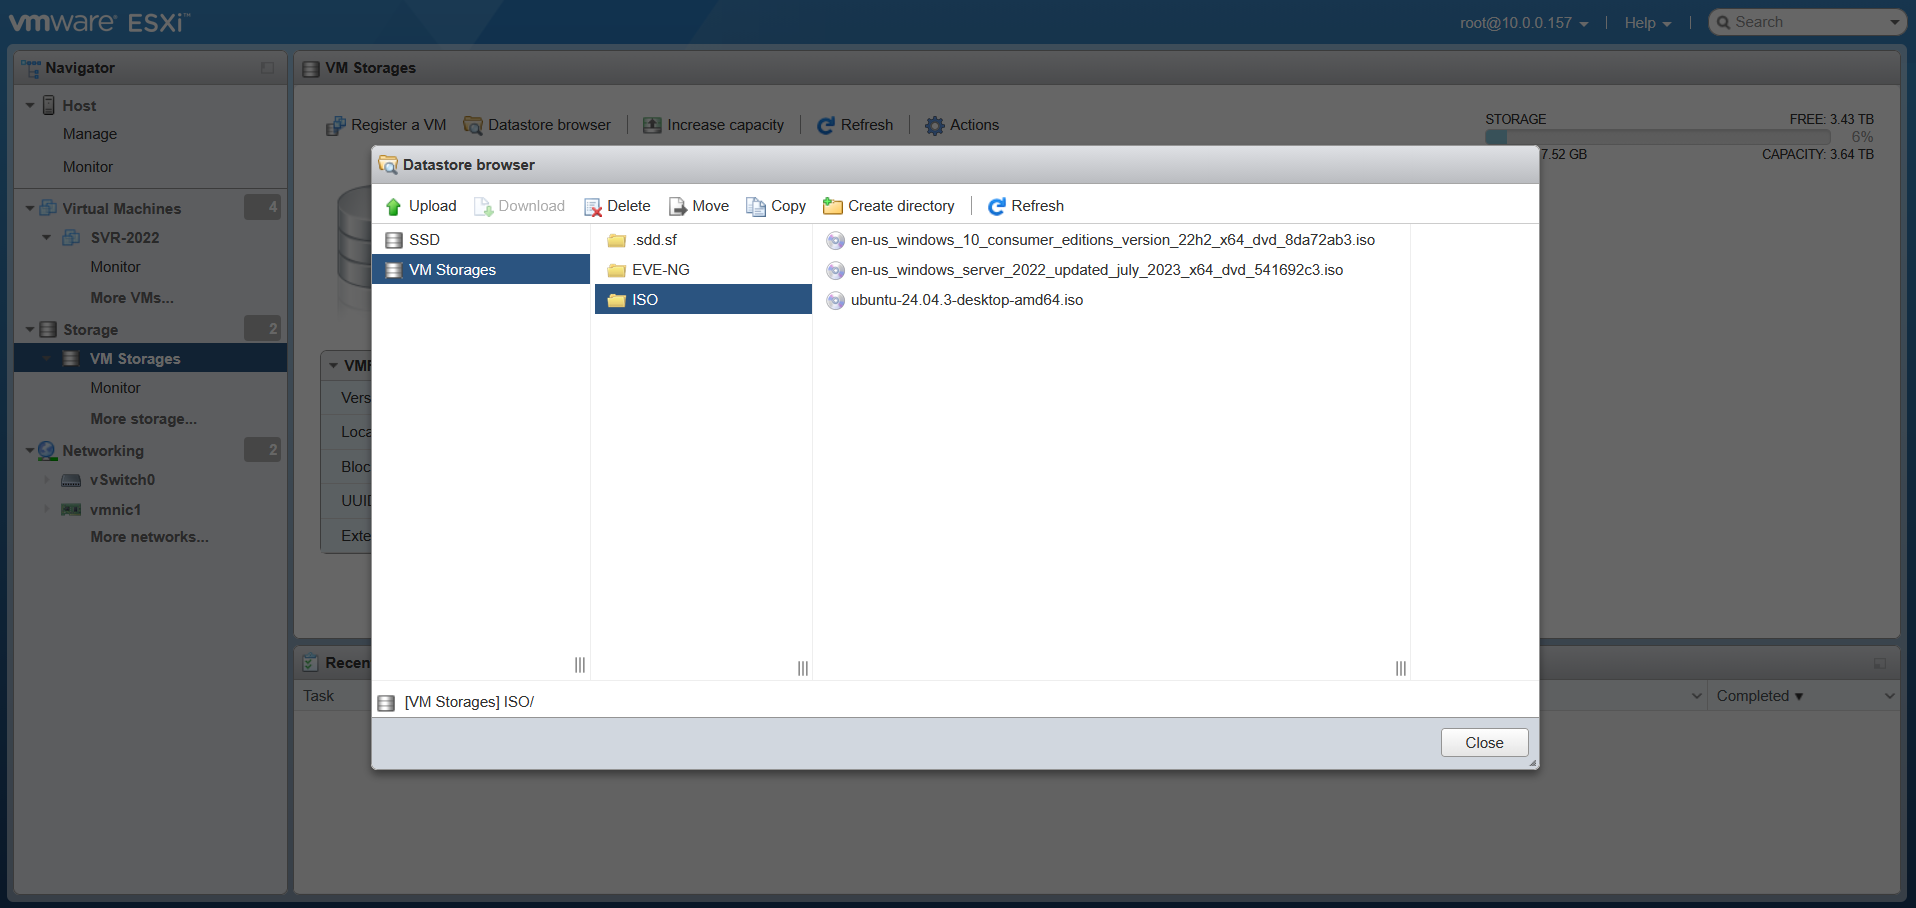
To deploy servers efficiently, I needed a central repository for installation media. I formatted the large RAID 5 array as my primary Datastore, providing ample space for VM disks and files.
I created a directory on this RAID 5 datastore specifically for ISO images and uploaded the following:
- Windows Server 2022
- Ubuntu Server 24.04
- Windows 10
Key Takeaways & Skills Gained
This project laid the groundwork for the rest of my homelab. By manually provisioning the hardware and hypervisor, I demonstrated:
- Bare-Metal Provisioning: Experience wiping and setting up enterprise server hardware from scratch.
- Tiered Storage Management: Configured a high-performance SSD (RAID 0) for the hypervisor boot volume and a redundant HDD array (RAID 5) for secure data storage.
- Resource Pooling: Established a Type-1 Hypervisor environment to effectively manage and allocate CPU and RAM resources across multiple virtual machines.
- Virtual Networking: Configured the management network for remote administration.