Executive Summary
This project demonstrates the implementation of a hybrid lab environment for CloudTech, where end devices dynamically obtain IP addresses from a centralized Windows Server DHCP hosted on a separate virtual machine. The setup was achieved using VMware Workstation's Custom VMnet5 to create an internal network that bridges both VMs securely.
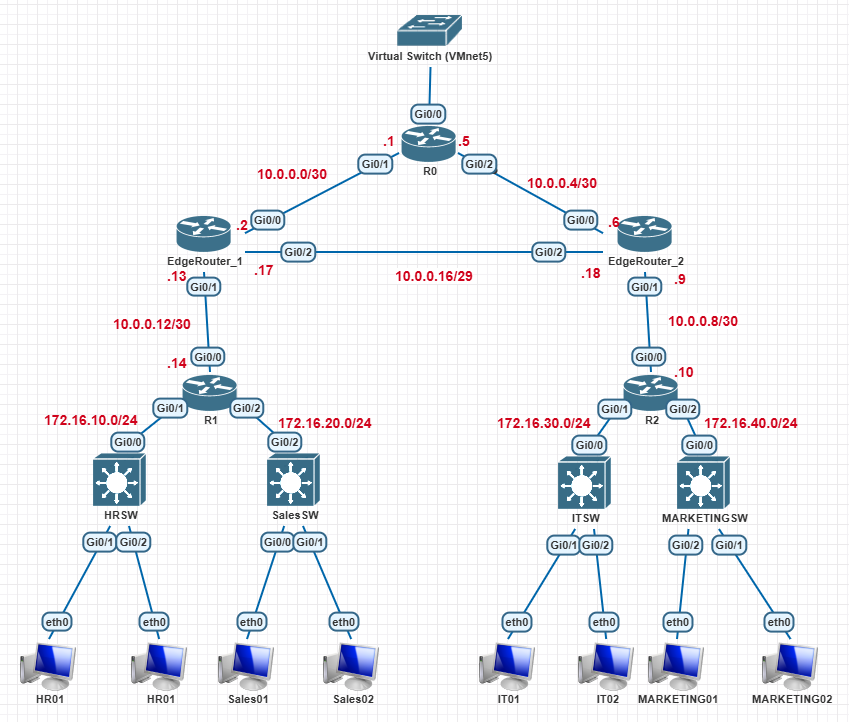
Topology Reference
Details
Setting Up The Custom Vnet (VMNet5)
The custom VNet acts as the physical link between the two Virtual Machines (Windows Server with DHCP role and EVE-NG which has the routers, switches and end devices). We will use the 192.168.50.0/24 network for this bridge.
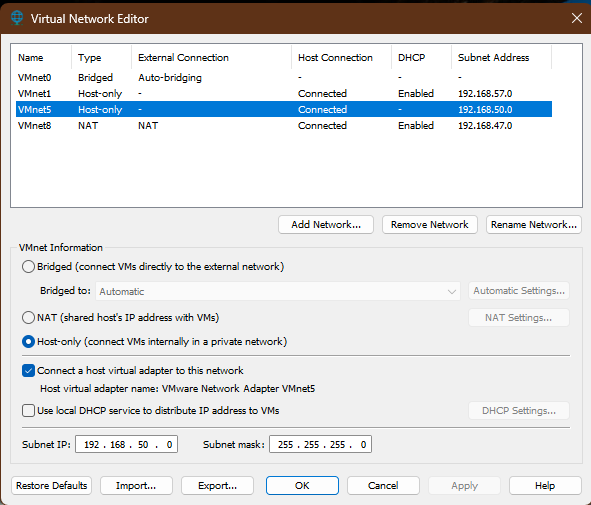
- Configure VMnet5: In VMware's Virtual Network Editor, create a new, dedicated
Host-Only virtual network (VMnet5).
Disable the built-in DHCP service for this VNet.
VMware Virtual Network Editor - Assign Server IP: Add a network adapter to the Windows Server VM and connect it
to VMnet5. Configure the adapter with the static IP address: 192.168.50.5/24.
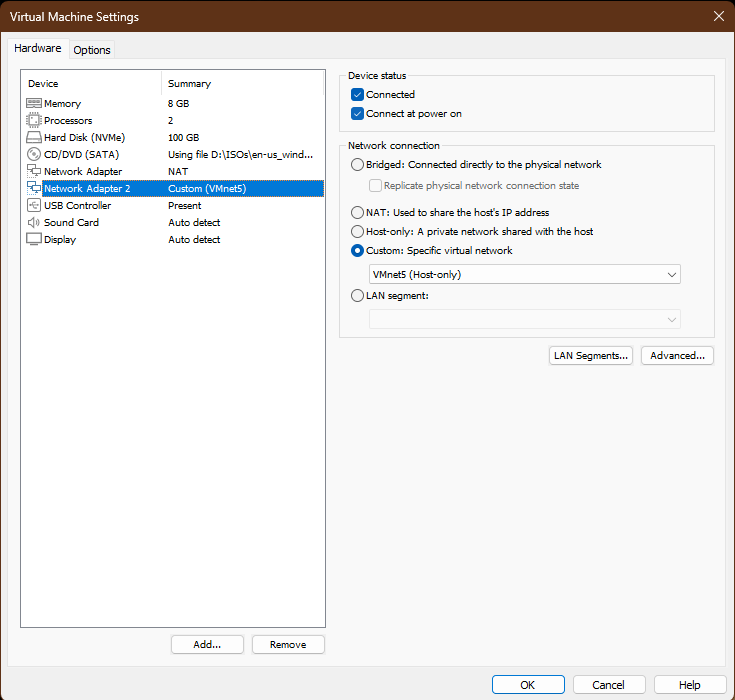
Select Custom: Specific virtual network - VMnet5 (Host-Only) 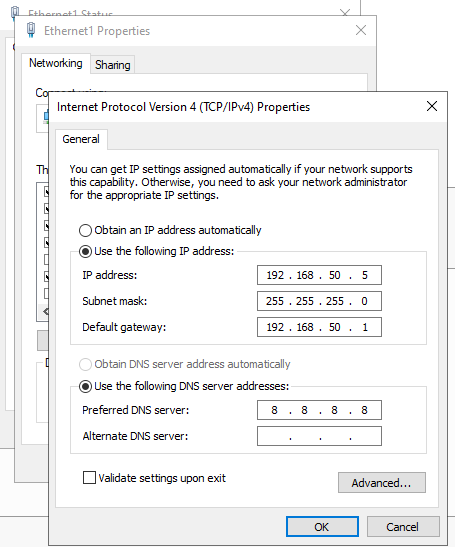
Assign Static IP to Windows Server - Add a network adapter to the EVE-NG VM and connect it to VMnet5. We will assign router R0's g0/0 interface with ip 192.168.50.1/24.
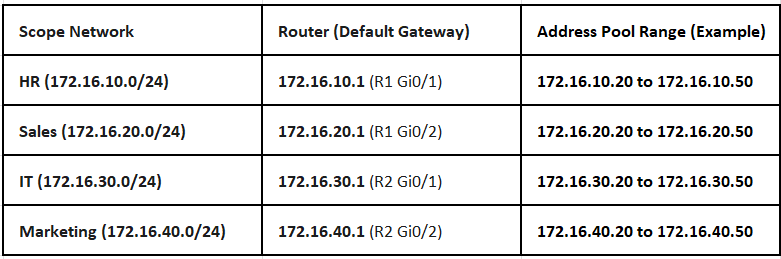
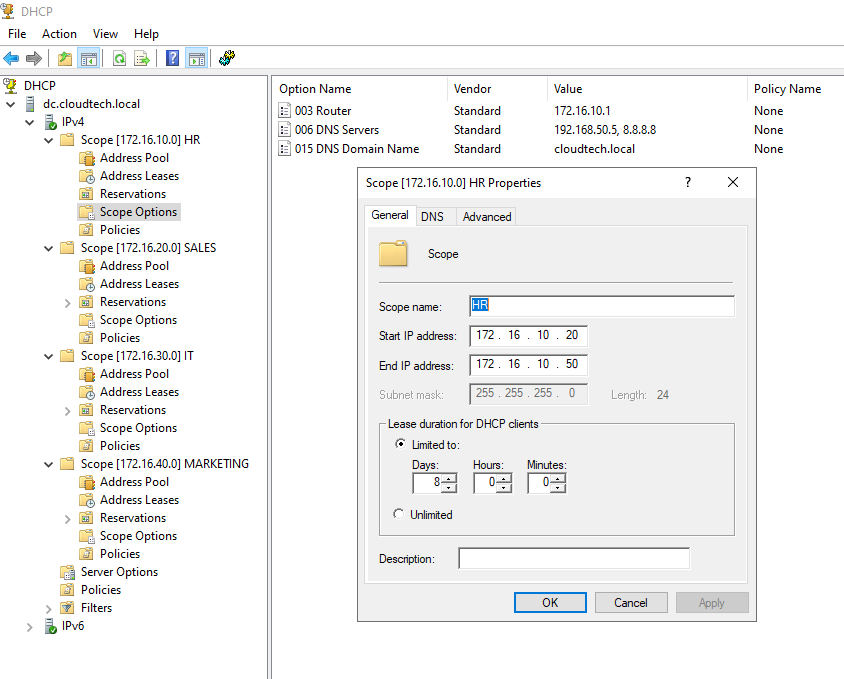
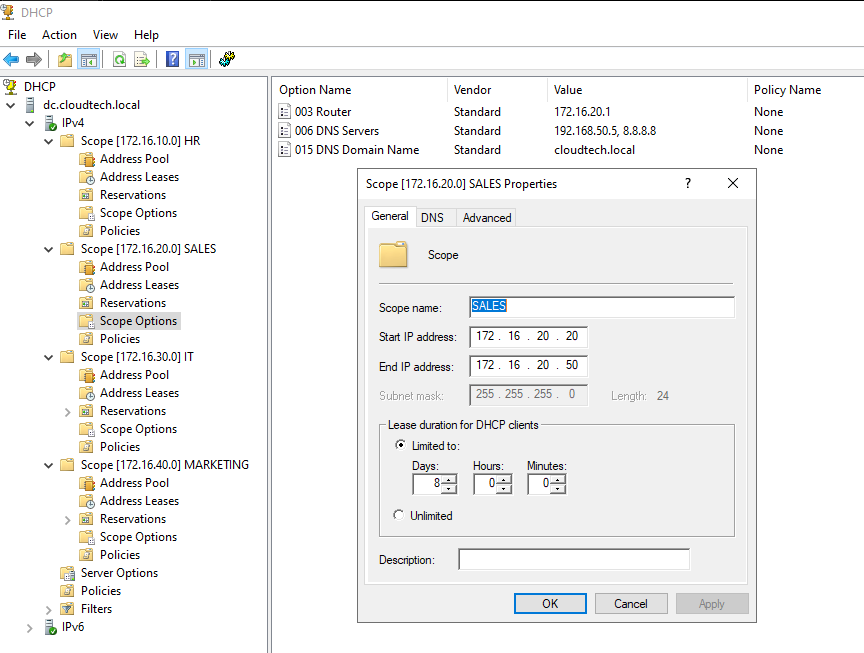
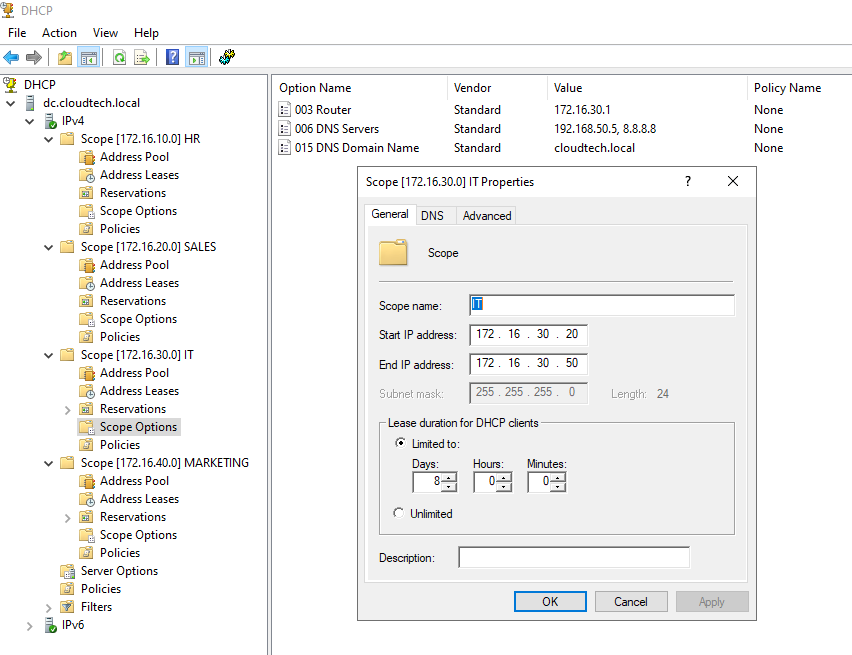
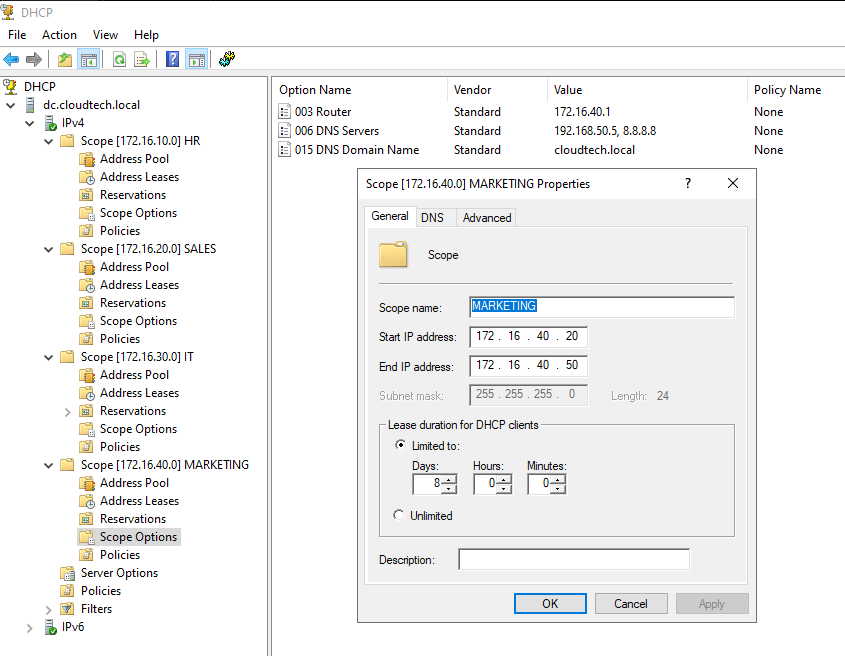
Configure DHCP Scopes on Windows Server
The Windows Server must be configured with scopes for all four client subnets in the diagram. The "Router" option in each scope must match the corresponding router interface IP as seen below.
Topology Build and Configuration
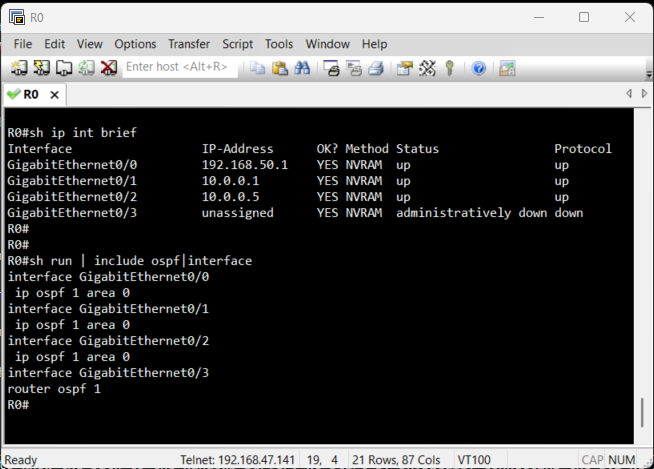
Before we can test DHCP, the routers need to know the path to the Windows Server. We start by physically connecting the EVE-NG lab to the external VMnet5 network as seen in the topology. Then, to make the entire network function seamlessly, we will configure OSPF. This protocol will handle the complex route discovery process, ensuring that every router automatically learns how to reach the DHCP Server and all client subnets. Configuring OSPF directly on the interface is a modern, explicit approach that prevents accidental advertisement of unintended networks.
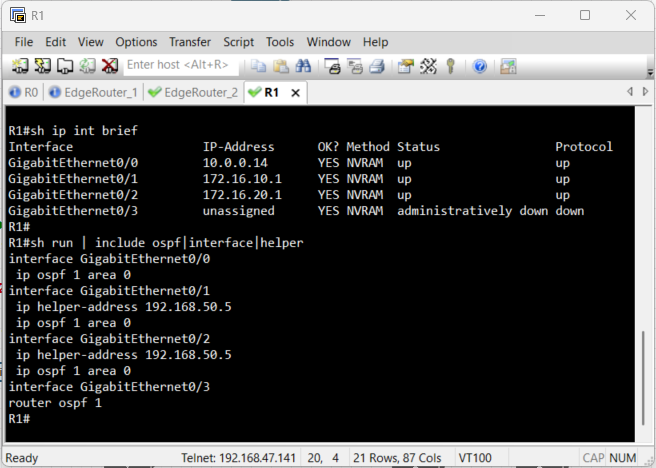
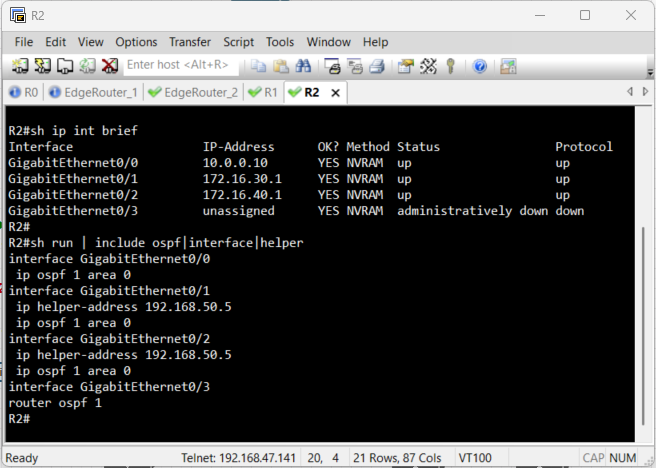
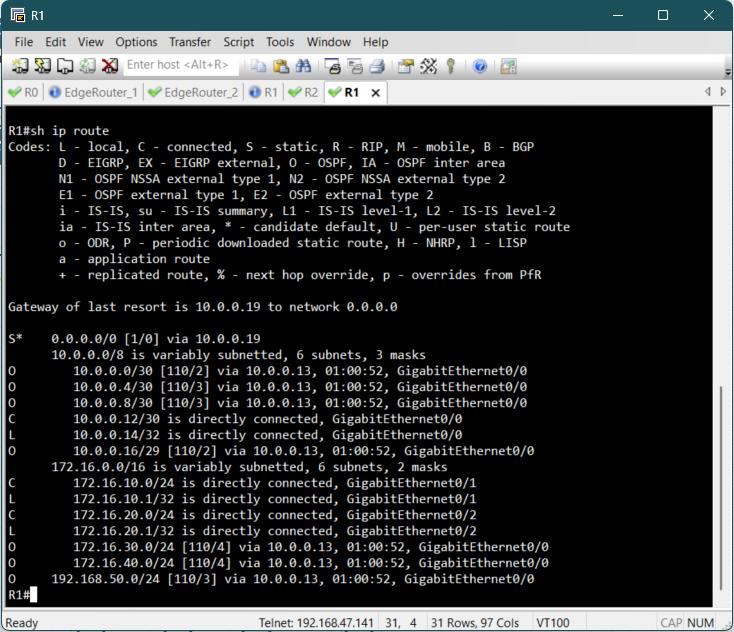
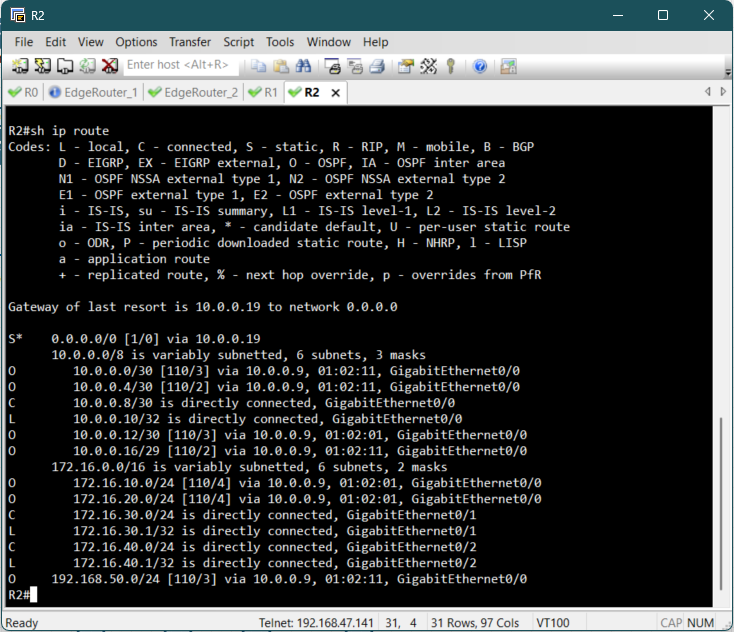
Verification of Routes
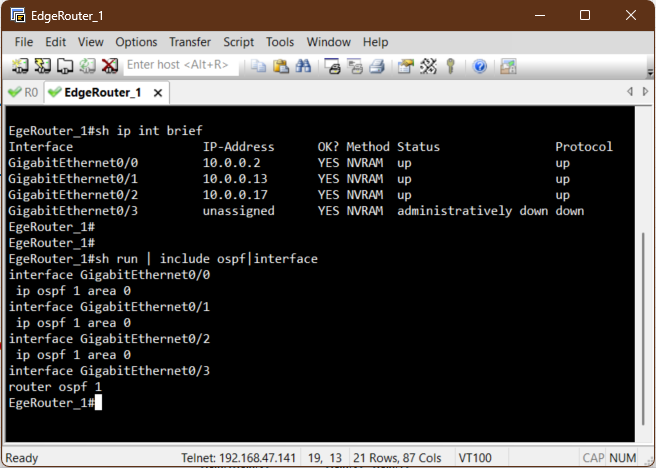
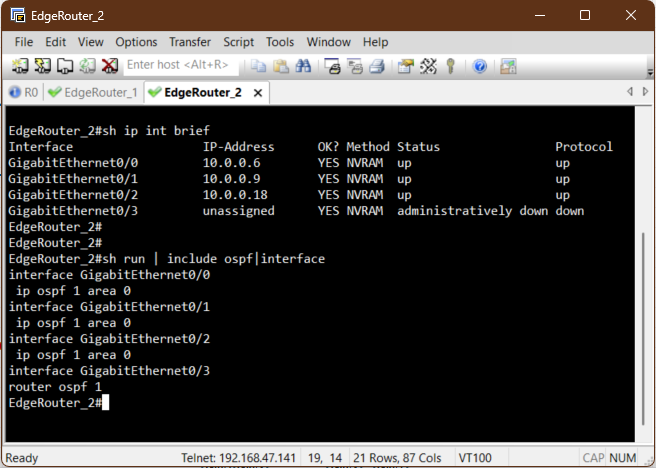
Before a client can successfully get an IP address, we must confirm that the access routers
R1
and R2 know the path back to the external Windows DHCP Server.
Since we enabled OSPF on all interfaces, this should be automatic. We use the show ip
route command on the Access Routers to verify that the path to the DHCP server's
network
and other routers are
present in the routing table.
Verification of Client IP Assignment
With the DHCP Scopes configured on the Windows Server, the DHCP Relay enabled on R1 and R2 and the OSPF routes confirmed, the final step is to test the dynamic IP address assignment from the perspective of an end-user device.
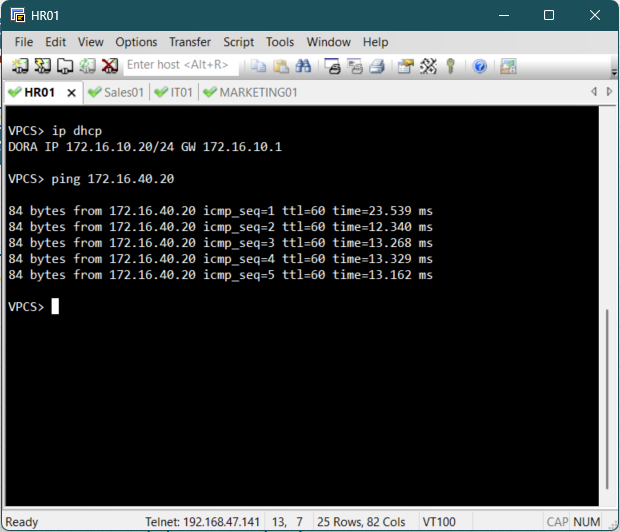
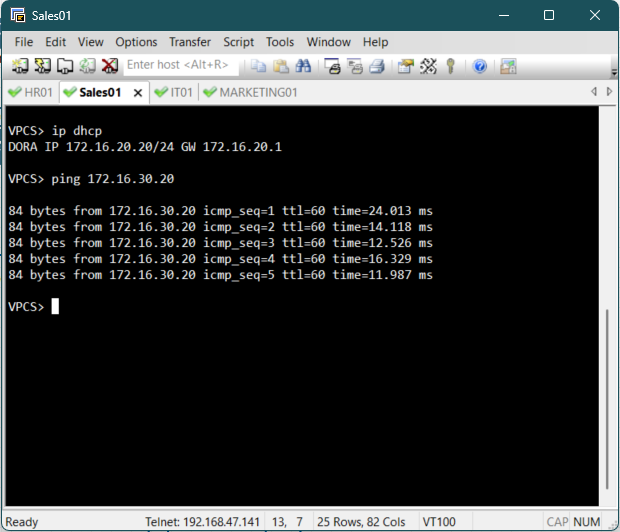
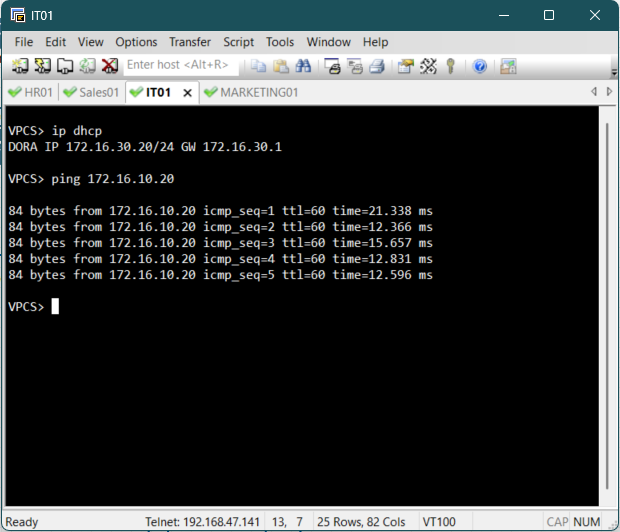
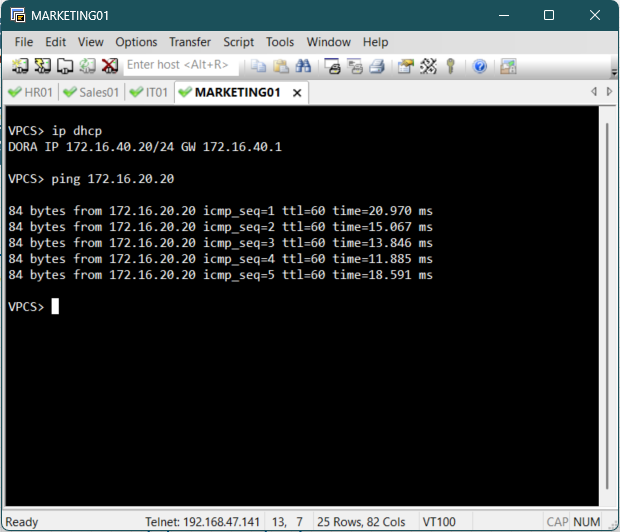
To trigger the DHCP process on a client PC, access the console for one of the end devices and
execute the ip dhcp command to send a DHCP request.
Upon successful execution, the client should display an output confirming that an IP address
has
been acquired from the remote DHCP server.
The client should receive an IP address in its respective subnet and should be able to ping
other PCs in the different subnets.
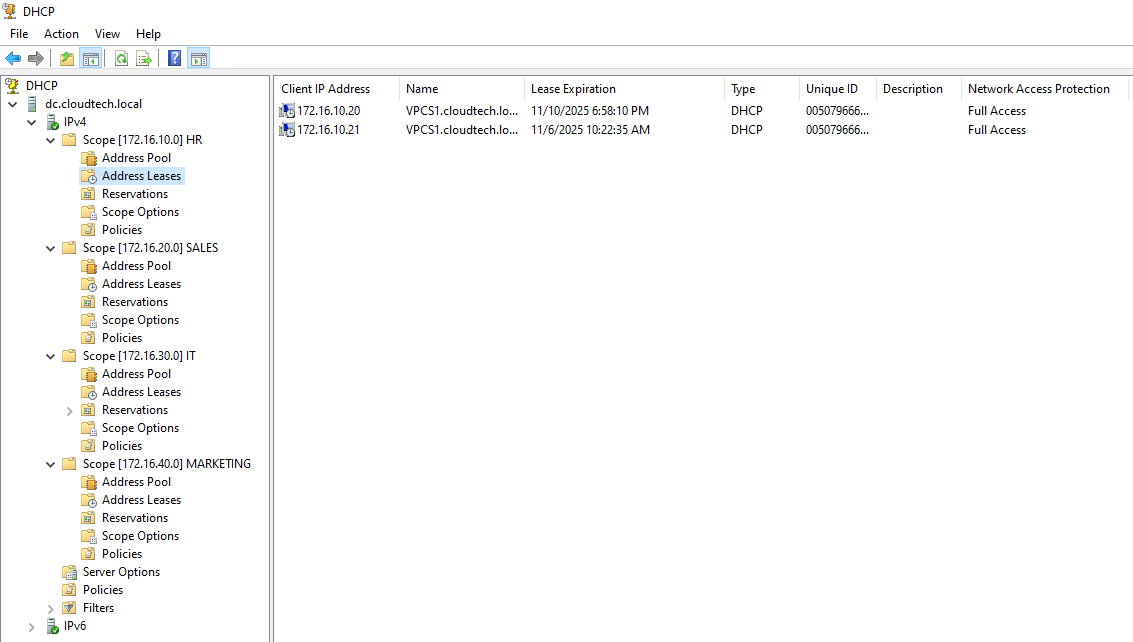
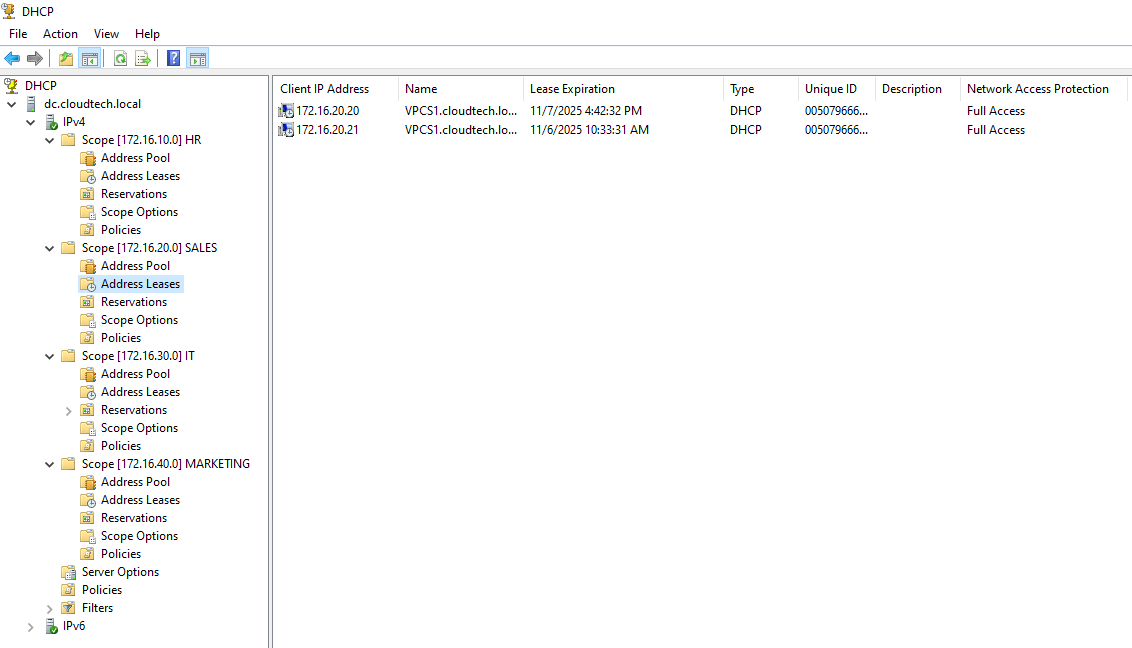
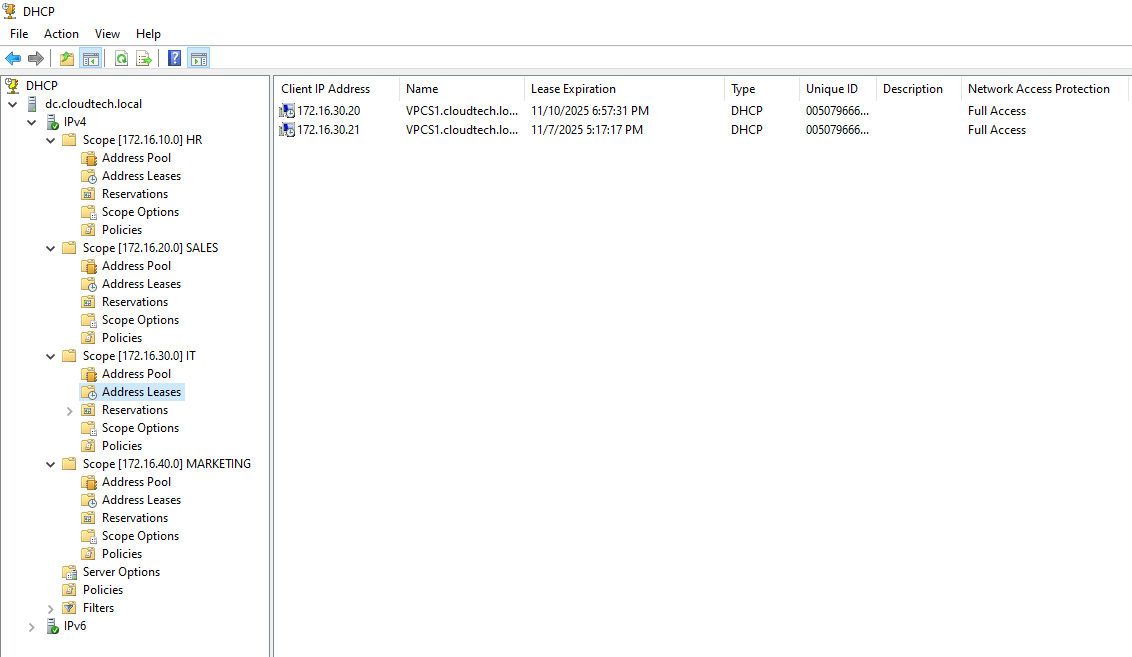
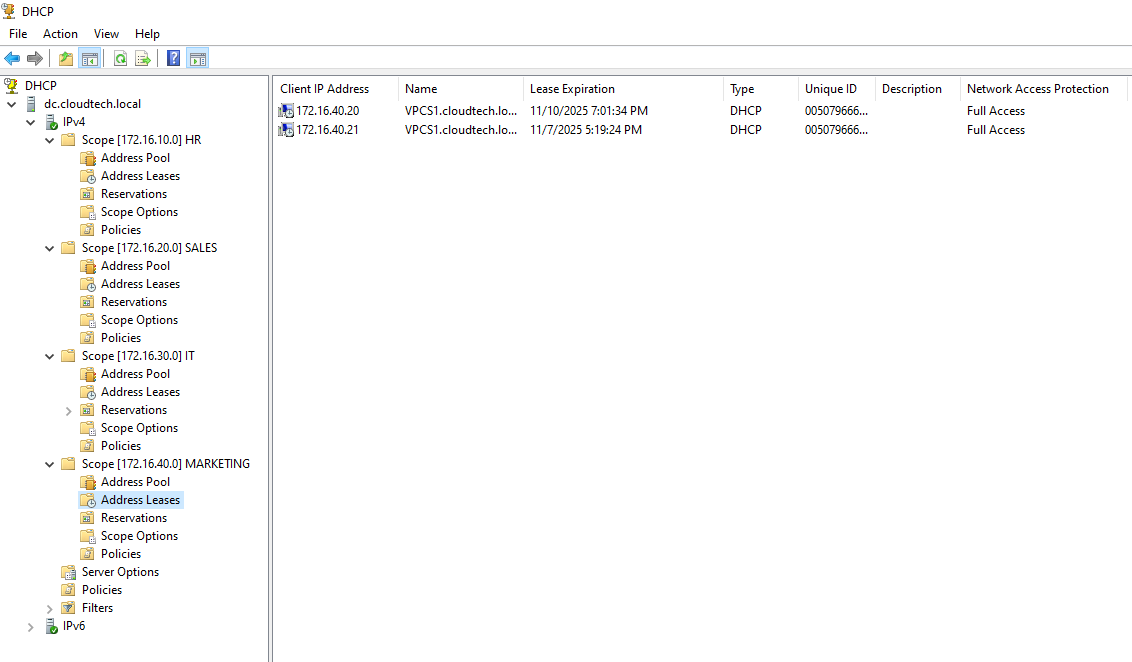
Verification of Address Leases
To confirm that the external Windows Server is actively managing the IPs for the simulated
lab,
we can inspect the address leases directly in the DHCP Management Console.
Conclusion
This project successfully implemented a robust hybrid network solution, validating key skills in virtualization and network services. By integrating a Windows Server DHCP service across a dedicated VMware Custom VNet and a complex EVE-NG topology, we achieved centralized IP management. Core accomplishments included configuring Layer 3 DHCP Relay on access routers R1 and R2, deploying OSPF dynamic routing for full reachability, and leveraging the VNet bridge for network isolation. This centralized design enhances security and auditing by eliminating rogue DHCP risks and demonstrates proficiency in building and securing scalable enterprise infrastructure.